Recent Posts

Showing posts with label Outdoors. Show all posts

Beach Day


One of my best friends and former college roommate, CJ, came to visit me this weekend!  Her visit was much needed and I enjoyed every minute!  As soon as she got here, we went to the beach and it was perfect! Here are some photos from our day.


CJ actually found that starfish in the water and I fished it out. I've never actually found a live starfish before so I was super excited.  There were also crabs scurrying along the sand, but I never could get one to stay out of it's hole long enough for me to get a good picture.
...considering the fact that I live in Florida, I need to make it a point to get to the beach more often!

On a random side note; we played with our hipstamatic/instagram apps on our phones all weekend.  So fun.  I want to know when someone is going to make an actual camera with all of those cool filters on it!


Don't forget to enter our Big 50 Giveaway!


Hope you had a wonderful weekend!  

A Failed Project

Well, I am very disappointed.  I had this great project planned for today that I was going to tell you all about and...I failed...miserably.  I'm too embarassed to even show you the pictures.

Oh well.  I'll try again soon {since I know now what the problem was} and share the success story.

Instead I'm going to brag a little.  Do you remember when I found this great wire drinking glass holder?  I posted about it HERE.
It came from a cute little antique store and I had been looking for one.  When I got it, I bought mason jars that were small enough to fit into the wire circles and it's worked well as a catch-all {you know, for all of the change, pens, gum, etc. that our husbands dump out of their pockets when they get home} near our front door for months now.

Recently, I've seen a couple of different bloggers that have utilized a wire basket with mason jars as vases.  Like this one here from Life in the Fun Lane.  It's so simple but adds such a sweet touch to a space.

So, I made my own using the drinking glass holder and mason jars that were already it in {minus all of the items that had accumulated over the past few months}.


So, even though I failed miserably at my other project, I still have this arrangement to brighten my day!

Happy Summer!

Spring Things

If you remember, a while back, I posted here about this great idea from Martha Stewart about painting your house number {or apartment number or condo number...or room number, if you live in a dorm} on a pot for the outside of your home.  
In this picture, it added the sweetest touch and I loved it!
Since this is my last year of teaching and I've been cleaning out my classroom, I've stumbled upon some fun stuff, one of them being a set of large stencils!  I know this may not seem like a really great find to you, but this project instantly came to mind {since I still hadn't done it}, so I was very excited.

The steps are in the original post {and if you want to skip steps 1&2 and buy your own stencils instead of making them, I would highly recommend it!}, but it basically just requires taping the numbers to a pot a then painting or sponging on the paint. {I used acrylic which is what Martha recommends as well}.

Here is my finished product:
The numbers aren't as special as the ones in Martha's article but I still like them--clean and simple.
{I couldn't resist a close-up of pretty petunias that I love--they withstand our Florida heat!}

While I was moving some of the pots, I noticed that the soil was lifted and broken in one of the smaller pots.  Once I looked closer, I found this little guy just hanging out!
He's not very cute, and he found his way back the next day...oh, well.

We planted our garden about a month ago and are already getting some great produce.  Since I was outside and the weather was nice, I decided to take some brag shots to share with you:
{this is our first real vegetable producing garden so I am pretty proud}
{tomato}
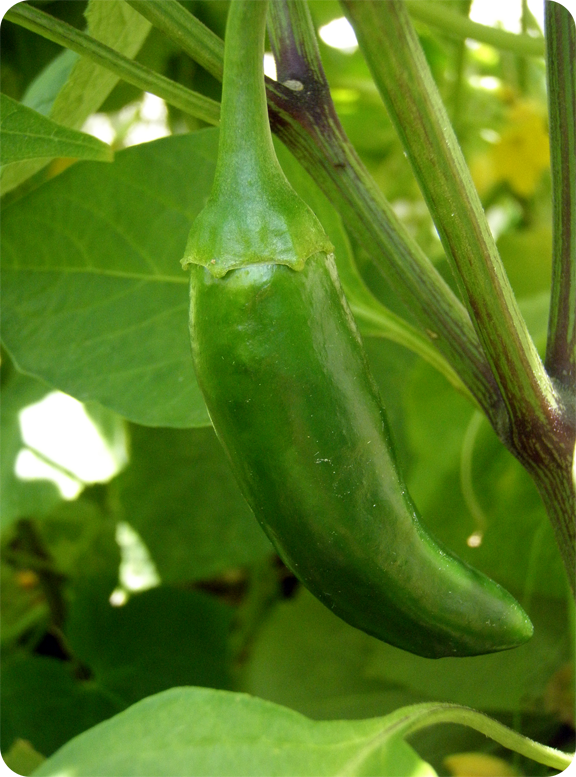
{jalapeno pepper}
{beans}
{cucumber--lots and lots!}
{banana pepper}

and this little guy was doing all the work...
...I know, not so sweet, but doing me a big favor!

How does your garden grow?

Happy Tuesday!

Pretty Petals


Well, I planted my Petunias and my Geraniums are blooming so I've got flowers on the brain.  Putting together a nice flower arrangement is something people pay big money for...it can also add new life to a space, so if you know how to do it right, you've got skills ;).

Here are few tips courtesy of BHG that will help you as you put together your spring flower arrangements:

-Water Temp Matters-

Warm water helps tightly closed flower heads, such as roses or ranunculus, to open fully. Leave them in water for a day or two before using them.

-Use Foam-

Use florist's foam to keep flowers in place and constantly hydrated so they last longer. Soak the foam for 15 minutes before cutting it to fit the container. Water the foam every couple of days.
  

-Trim, Trim-

Recut stems just before adding them to the arrangement. Strip off any leaves that fall below the water line. {<---thought this was very interesting}

-Picking Flowers-

Add large, heavy flowers first, fill in with smaller, airier blooms, and leave enough space between the stems so individual flowers have room to shine. Include flowers with various shapes and stem lengths.
  

-Height Matters-

Make your bouquet taller than its container by about one and a half times. Also, make the width balance the height.
  

-Fill-In-

Save larger leaves and stems with leaves on them to fill in around the flowers. Drape some of the greenery over the container's rim.

-Proper Placement-

Keep flowers away from sunlight and heating vents. Recut stems and add water often.

-Make an Impact-

For the most natural look, gather the blooms into clusters of like flowers, rather than placing them individually into a more carefully arranged bouquet.

 Now, get to pickin'!

Paint and Planters

I don't know about you, but I'm ready for spring!  We've had really nice weather here recently (60's and 70's) but I think, soon, we're going to get a touch of this winter storm that's hit every other surrounding state.  Errr...  Regardless, I'm thinking Spring; bright, sunny, and cheery... and even though this project doesn't necessarily have a season, it can brighten-up the exterior of a home quite nicely.


House numbers on planters!

Here are the steps according to Martha... 


1. Select a font from your computer. Enlarge and print the numbers in various sizes to see which works best on your planter. 

2. Using a printer and cardstock, print the numbers in desired size, on a single sheet if they fit. Make a stencil by cutting out the numbers with a craft knife.

3. If the numbers were printed separately, tape stencils together, spacing numbers about 3/4 inch apart. Use masking tape to adhere stencil to planter. 

4. Choose acrylic paint in a color that stands out from the planter. Use a sponge or a stencil brush to dab paint into stencil. Let dry, and remove stencil. 


I've tried making a stencil on my own before and it can be difficult.  If you'd rather purchase a stencil and use it on a planter--it would definitely still be cute!

Or!  If you're not into the planter idea, here a few other options for house numbers...


What's your number?

Double Duty Pots and a 4th of July Weekend

I hope that everyone's holiday was as wonderful as mine!  I had a great time in Atlanta with my old roomies!  We got to have a picnic while enjoying the Peachtree City fireworks on the golf course (apparently that's "the place" to see them, so we went!).  

Jen's son, Graham, is one of the cutest little kids I've ever seen.  It was so fun getting to spend time with him for a few days!
Here is a picture of everyone--Jen's got baby #2 on the way!  CJ and I are hoping for a girl. :)

Anyway, I'm back and I found the cutest idea for herb labels and wanted to share it with you!  Since I'm having a hard time finding cute stakes to label my herbs with, I thought I might try this in the future for my potted plants:

Terracotta pots and a small can of chalkboard paint are super cheap!  It would be so easy to make these pots and it would simplify labeling, for sure!

This would also be a cute planter idea if you have a vintage, wooden tool box.  Although, I'm pretty sure that I saw one similar to this at Joann's the other day for like $10 on sale....hmmmm.


These would make great gifts too--Housewarmings, Mother's Day...I'm just saying.  I would looooove a little plant in a cute pot..  Although, I'm a little obsessed with plants, just ask some of my former students. :)

I am planning to check out Tuesday Morning for cute label stakes, since my window planter wouldn't be conducive to chalkboard labeling. I'll let you know what I find.

Happy Back-To-Work Tuesday!


How Does Your Garden Grow?

I love gardens!  When I was in college, I got on a gardening kick and started one at my parent's house when I came home for the summer.  Since then, though, I haven't had the space to create my own, I've only been able to admire others.  I was inspired a couple of months ago while visiting my best-childhood-friend's mother's house.  She has to most wonderful variety of garden vegetables and herbs.  I loved it!  She says that, now that her kids are out of the house, she has time for a big, beautiful garden like this. 
 She spends about 1 hour a day working in her garden but, clearly, the results are worth it.


While I still don't have the time to spend on a garden like hers, I noted her little window herb garden and decided that I did have time for something like that!  I got this wire window basket from Joann's with a 50% of coupon for $15.
I already had a bag of potting soil, so I bought 4 packs of herbs from Lowes and went to work.  I planted two of the seeds directly in the basket outside, but I had to start the other two seeds inside and then transplant them after they'd grown big enough.  At this point, I've transplanted all of the seeds and am just watering and waiting.

It's funny though; I'd heard that Cilantro was really hard to grow and my Cilantro is growing better than any of my other herbs.  I'm very proud!
The other three herbs that I have are:
Parsely
Rosemary
...and Dill. 
I'm sad that my dill isn't growing better because I looooooove dill!
I also got a sprig of mint from my mother-in-law and re-potted it; it's growing wonderfully!
This type of garden is super easy and inexpensive.  It's great for people who work, have kids, and/or just don't want to devote tons of time to a garden...you have your own fresh herbs and spices AND it's a cute adornment to the exterior of your home!
 I am on the lookout for some cute labeling stakes for my herbs, but haven't found any.  I picked up these cheap, white ones at Wal-Mart for the interim, but am hoping to find something better soon.  Let me know if you have any ideas of where to find some.  I know that Target has had some in their dollar section in the past (because I bought them for my mom) but, when I went back, they didn't have any.

Maybe one day I'll have gardens as beautiful as the ones I visited at Biltmore :)
and a coi pond, taboot
...well, at least I can dream. :)

Happy Gardening!


Related Posts with Thumbnails