
Recent Posts

Showing posts with label Decor. Show all posts

a new room

My sisters-in-law want to re-do their room and have asked me to help.  Now, when I say "re-do", I mean clean, organize, and THEN re-do.  We've done our basic programming (trying to incorporate what a college student and a middle school student living together would like), have cleaned, organized, and shopped.  Now, all that's left is to paint and install.  I'm really excited about about the finished product.  We're on a tight budget but have had lots of success finding exactly what we're looking for at a price that's within our budget.

I have before and during pictures right now, but will wait to post all of them until I have the after pictures.  In the meantime, here are the idea boards I created for them.


Have a great labor day weekend!  We're headed to the beach to celebrate our 5 year anniversary--hope you all get to relax a little as well!

Top Ten Fabric Patterns 2011

Lately I have noticed a certain trend in popular fabric prints.  Whether I walk into Joann's, search for cute paper goods, or browse blogs, I keep noticing the same patterns over and over and I love them!  So, today, I thought i'd share the top 10 {also MY top 10} fabric patterns of 2011 with you.  If you're trying to pick a new, fun, interesting print for something in your own home {throw pillows, shower curtain, rug, chair}, this might help you pick the perfect one.


{Disclaimer: while these are my top 10, they are listed in no particular order.  Additionally, the fabric may have different variations of the pattern even though I am only showing one.}

 No. 1
Chevron
No. 2
Fret

No. 3
Houndstooth

No. 4
Zebra


No. 5
Damask

No. 6
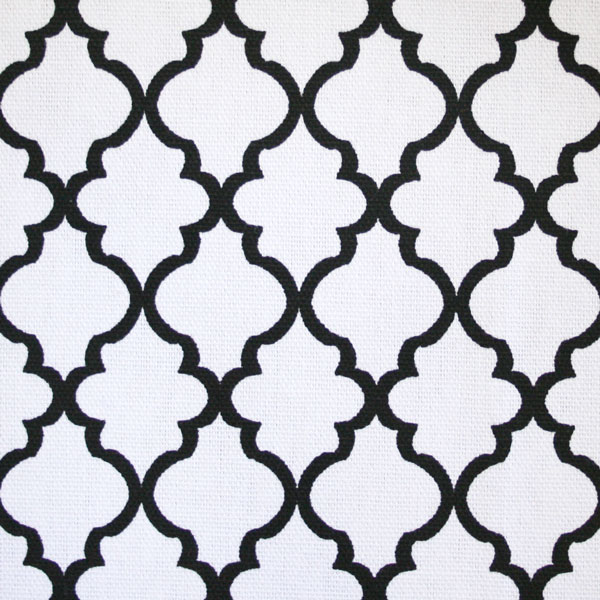
Trellis

No. 7
Quatrefoil

No. 8
Ikat


No. 9
Chippendale

No. 10
Naturals
{Linen, Burlap, etc.}

The End.

A Failed Project

Well, I am very disappointed.  I had this great project planned for today that I was going to tell you all about and...I failed...miserably.  I'm too embarassed to even show you the pictures.

Oh well.  I'll try again soon {since I know now what the problem was} and share the success story.

Instead I'm going to brag a little.  Do you remember when I found this great wire drinking glass holder?  I posted about it HERE.
It came from a cute little antique store and I had been looking for one.  When I got it, I bought mason jars that were small enough to fit into the wire circles and it's worked well as a catch-all {you know, for all of the change, pens, gum, etc. that our husbands dump out of their pockets when they get home} near our front door for months now.

Recently, I've seen a couple of different bloggers that have utilized a wire basket with mason jars as vases.  Like this one here from Life in the Fun Lane.  It's so simple but adds such a sweet touch to a space.

So, I made my own using the drinking glass holder and mason jars that were already it in {minus all of the items that had accumulated over the past few months}.


So, even though I failed miserably at my other project, I still have this arrangement to brighten my day!

Happy Summer!

Wine and Furniture..or Whining for Furniture

Last Saturday we got to enjoy the {free!} wine tasting at World Market. I have to confess, I'm really not a wine snob, nor do I pretend to be, and sometimes wine tastings and such can be quite intimidating for my simple {sweet, white, and bubbly} taste, but I really enjoyed it...and learned a lot!

Despite the education I received, I tasted my favorite at the first table--Moscato Asti
Like I said earlier; sweet, white, and bubbly.  If you're sweet, like me, I would definitely suggest this one.

As we entered World Market, I warned my husband that this was a dangerous place for me...  And shortly after we walked in and I got distracted and wandered off, I found these...a fell in love.

I love the industrial look of them--although, not too industrial because the wood softens them just enough.  I especially love that they're on casters, though.  Nice touch.

I also spotted these glass table lamps that I have been looking all over for!


I didn't get too close, though...

Unfortuantely, the price tags were a little out of my range, so I settled for some free wine {and snacks} and a bar of really good smelling soap.

I did get this in my email today, though
and I would love to share it with you. :)
Just click {to enlarge}, save, and print!

Have a sweet weekend!

Summery and Festive

Well, I am officially done with teaching...for good.  I've graduated with my interior design degree and am working at the cutest little residential firm doing design assistant work and marketing!...mainly marketing, which I am really enjoying.

The city is having a 4th of July event right outside of our storefront, so we will be hosting an open house that day.  The city's theme is "Red, Rock, and Blue" so we are trying to come up with a modified red, white, and blue theme that's appropriate for the 4th of July.  Red coral has been suggested, which I love!...and it got me thinking how big coral is for the summer!

Here are a few of the inspiration photos I found along with a great Pottery Barn knock-off tutorial.


It all reminds me of one of my favorite prints  {Sandy Toes & Salty Kisses} from my shop


...and of course, I love the idea of hanging bunting...

Anyway, I am super excited about summer and this event!  I'll try to snag some pictures to share with you once everything comes together.

On that note, I'll leave you with a great tutorial with coral from Beth at Home Stories A to Z.  She made this for next to nothing!

Go check it out!

Happy Wednesday!


Liven up your Loo

On my {very unsuccessful} garage sale shopping trip this weekend, I had a conversation with a woman about decorations in the bathroom.  She seemed to think that most people didn't add accessories or wall decor to their lavatory, but I beg to differ! 
There's a lot to be said about a well-decorated bathroom...especially considering the amount of time women spend getting ready in them! So, in honor of garage sale stranger {and our random conversation}, here are some great bathroom inspiration decoration pictures courtesy of :


Spring is here!...and I'm spring breaking.
Hope you're enjoying some fun in the sun too!

Tray Chic

I have to admit, I really love Martha Stewart's style.  The photographs in her magazine along with all of her great vignettes (especially for the holidays) are beautiful...and usually leave me drooling. Her craft ideas are sometimes a different story, though.  Hers always turn out beautifully, but mine never make the cut.  

I could blame this on my own {lacking} abilities, but I consider myself a pretty decent crafter and always follow her instructions to the T.  This leads me to believe that accomplishing the same outcome that she does {supposedly} might require extra help.  Really, I think she uses very specific materials that aren't easy to come by and lists "substitutes" that might work {but usually don't}. 


Anyway!  All of this to say, I think I might have found a craft idea of hers that could actually work!
 Check out this great tray!
It's made out of a cookie sheet and fabric!  Listed below are the steps  {according to Martha}

  • 1 yard decorative fabric
  • Aluminum rimmed baking sheet
  • Spray adhesive
  • Scissors
  • Fabric glue
  • Synthetic felt
  • 1/4-inch-thick acrylic sheet cut to fit inside of tray, with corners rounded
1. Cut fabric large enough to cover the front and wrap around the back of the baking tray. Cover the front of the tray with spray adhesive.

2. Place fabric on tray so pattern is aligned, leaving enough room to wrap fabric around all sides to the back. Smooth fabric onto tray, pressing out any bubbles.

3. Pull any extra material into corner and push around the edge. Turn tray over. Cover the back of the tray with spray adhesive.

4. Press the fabric over two edges of the tray first, then fold in on each remaining side, as if wrapping a gift. Trim any excess fabric with scissors. Use fabric glue to secure, if needed.

5. Cut a piece of felt to fit the back of the tray and conceal fabric edges. Smooth felt on the back the tray.

6. Place acrylic sheet in center of tray.
If you need a visual, watch the video here.

It looks simple enough, right?  We'll see, Martha. We'll see.

Happy Tuesday!

Thinking of Painting?

Since it's spring and everyone wants to freshen up their home {with paint?}, I thought you might like the
Paint & Preview Rooms Tool. 

Pick a pre-loaded image or upload one of your own and see how different paint colors will look in that space.
{this is a screen shot from the website so the lovely "unregistered version" stamp is visible}

Useful?  Hope so!
Happy Tuesday!
Related Posts with Thumbnails